Photon | Fullscreen Photography Wordpress Theme
Documentation
- created: 05/21/2015
- latest update: 05/21/2015
- by: Apollo13
- email: info@apollo13.eu
Thank you for purchasing our theme. In case of any questions or doubts, do not hesitate to contact us via our Support Forum: http://support.apollo13.eu/. We will do our best to solve any problem concerning the project.
At the same time we invite you to visit often our profile on ThemeForest since there will be appearing the improvements of our project and the newest theme updates.
Getting started(HOW TO DO IT?)
You have probably seen our demo page and this is why you bought this theme. To see most of this things in your page you will have to provide proper content for it, and here we will guide you how to achieve this.
I am totally new in to this. Do you have any video tutorials?
Yes we have:-) Please visit http://photon.apollo13.kinsta.com/pages/narrated-tutorials/. We hope it will help you.
More info here.
Error while installing/updating theme.
If you see message like "The package could not be installed. The theme is missing the style.css stylesheet.", then be sure that you extracting ZIP file with theme from whole ZIP file you get from ThemeForest before trying to install.
More info here.
My front page is empty or gives error message.
If you see empty front page after theme installation or message "Apologies, but no results were found for the requested archive. " it means you have to add some content or change front page to display something else.
You will have to add some posts/page or add some albums and albums list page. Next follow this section.
How to make/edit top navigation menu to look like in your demo?
Check this section.
Plugin X doesn't work as it should
Check our plugins recommendations and how they should be configured in this section.
I would like to modify theme, how can I do it?
If you like to edit some CSS and JS, or maybe some theme behaviour you should check theme modification section.
For Updaters(need to know!)
Here will be important info for users that are updating theme and may encounter some problems or 'need to do' things:-)
Hopefully there will be no important info here, so no extra actions will be required.
Known bugs
Here we will write about bugs that for now don't have any solution. However we are trying to solve them:-)
Installation & Update
Install
Before you install or update theme it would be good that get familiar with Wordpress info about it. To install theme you can:
-
Upload it via FTP(safer)
- Download ZIP file from ThemeForest and find in it photon.zip(theme file)
- Unpack files from photon.zip. You should now have directory photon-a13 and in it other directories and files like images/, js/, 404.php, header.php, index.php etc.
- upload whole photon-a13 folder to /wp-content/themes/ in your WordPress installation
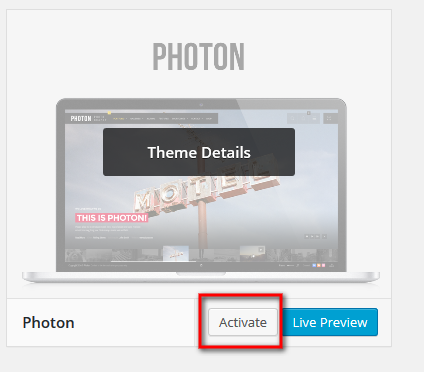
- login to admin panel in WordPress, and go to Appearance->Themes and click Activate below Photon theme
-
Upload it via admin panel(can get error while upload on slower connections, or cause of other issues)
- Download ZIP file from ThemeForest and find in it photon.zip(theme file)
- go to Appearance->Themes->Install Themes(Tab)->Upload and choose file photon.zip
- go to Appearance->Themes and click "Activate" below Photon theme
After that you will see new menus like for example Appearance->Photon Sidebars or Appearance->Photon Import & export BUT all fun begins in Appearance->Customize :-) Also you will see Albums menus. We will talk about them later.
Before you proceed any further you will have to install required plugins by clicking link in top notification, check images below:

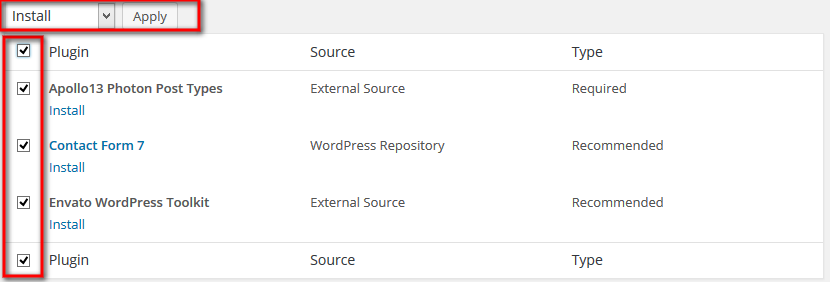
If you don't want to install all recommended plugins you can dismiss notice.
If some of embeded plugins fails on install you can go to photon/advanced/plugins and install every plugin(zip file) from there manually, by wordpress panel http://codex.wordpress.org/Managing_Plugins#Installing_Plugins
Update theme
Updating using Envato WordPress Toolkit plugin:
To update theme you can either follow below description or try to use plugin from Envato named Envato WordPress Toolkit. Here is description how to use it http://premium.wpmudev.org/blog/how-to-update-themeforest-themes-with-the-envato-wordpress-toolkit/.
This plugin is bundled with our theme, so you should be able to install it during theme installation. It is good plugin if you often use themes from ThemeForest and it makes updating commercials themes as easy as those from Wordpress repository.
Updating standard way:
When you got zip file with theme, best way to update theme is to use plugin such as http://wordpress.org/extend/plugins/easy-theme-and-plugin-upgrades/.
If you have problems with updating theme from Wordpress admin panel, then delete theme (from panel or manually via FTP) and upload new version. It is same process as installing via FTP. You wont loose your theme settings.
If you have made some changes in theme files you will have to manually update to keep your changes.
Remember to always backup your data before update!
Use of Easy Theme and Plugin Upgrades
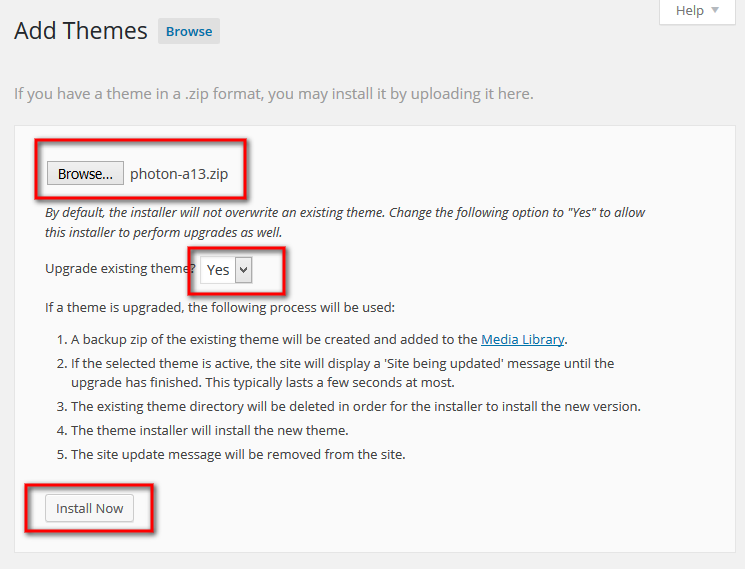
Upgrading a Theme
- Download the latest zip file for your theme.
- Log into your WordPress site.
- Go to Appearance > Themes.
-
Click the "Add new" button.

-
Click the "Upload Theme" button.

- Select the zip file with the new theme version to install.
- Select "Yes" from the "Upgrade existing theme?" option.
- Click "Install Now".
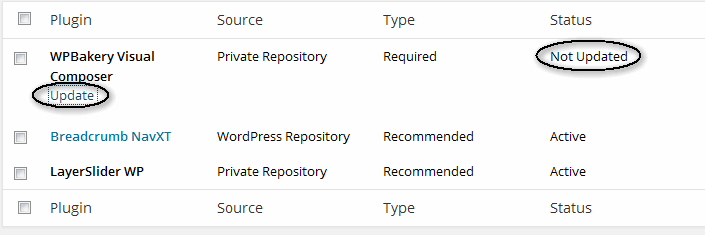
After installing new theme version there is chance there will be needed some plugins updates. You will see similar notice like when installing theme:

If you dismissed previously notice about plugins, you will also wont see it after theme update. To see it again you will have to deactivate and activate again theme. You can also check if there is menu Appearance->Install Plugins. If this menu option is available then go inside and check what need to be updated.
This time you will have to manually update each plugin by clicking update under each outdated(Not updated) plugin. Check below image:
After installation
Install demo data
Many users are interested in making their sites exactly as our demo. To do it go and read Installing Demo data. You don't have to follow below steps in this case.
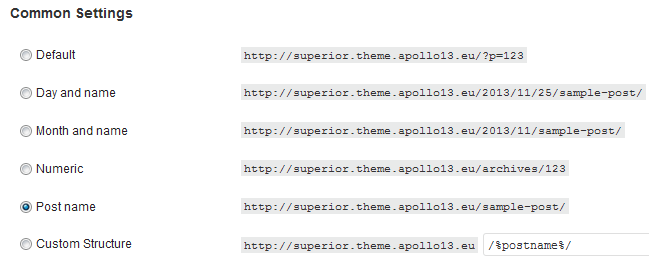
Set permalinks
It is good practice to set permalinks for your site. Go to Settings->Permalinks and set anything other then default seetings.
Install plugins
Check our plugin recommendations.
Add menu
Next you should choose menu to use in theme. To do it follow this.
Next you should scan through Theme options to set everything you need.
Installing Demo data
Theme demo data
We provide sample data, if you like to see how it is all made from backend in admin page. If you are confused about options in theme, we advise to use it only to see how things are made. After that, you should clean your WordPress so you don't have any unwanted content.
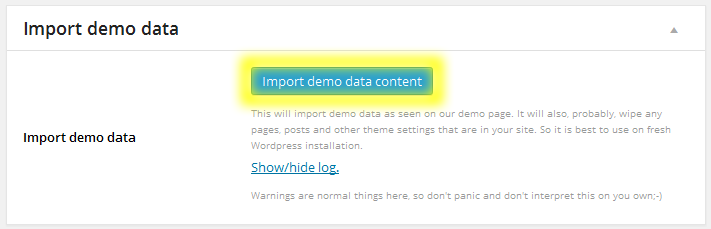
We provide one click import demo! You just go to Appearance->Photon Import & export->Import demo data and click Import demo data content. The process will then start and in few minutes you will have same version of theme as on our demo:-)
However you wont have many of pictures, music files, or other copyrighted content that is used in our demo, as we can't redistribute it. Thanks to this, demo will also import faster.
You need to know that importing demo data will also wipe any pages, posts and other theme settings that are in your site. So it is best to use on fresh Wordpress installation.
What exactly this button do?
- Removing content
- Installing plugins
- Importing content
- Setting up Front Page
- Setting menus to proper locations
- Setting up widgets
- Setting up permalinks
- Setting up various plugins settings
- Importing theme settings
Below is described alternative, slower, way of importing demo data:
- Locate the sample data file named like photonimport.wordpress.2015-05-25(or similar) in Dummy Data folder in file downloaded from ThemeForest.
- Open Tools->Import menu and choose WordPress option(Installation may be needed first).
- Upload sample data file.
- On next page you should check Download and import file attachments
Sometimes import can fail, cause of timeout while downloading images, so you will have to repeat above steps few times, till you get success message. After this fallow next steps:
- Go to Settings->Reading->Front page displays and do this
- Go to Appearance->Customize->General->Front page->What to show on front page? and set to what you like.
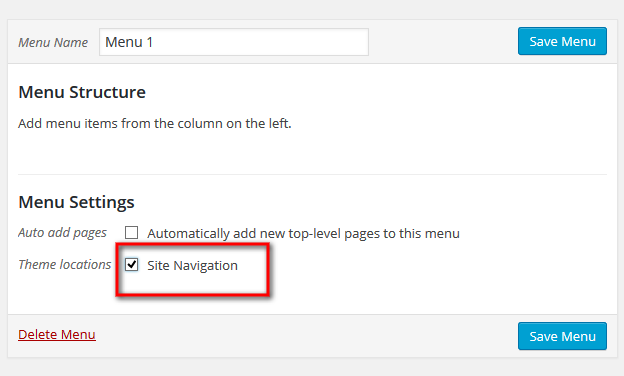
- Go to Appearance->Menus and select one menu Theme locations to be Site Navigation. See adding menu.
- You may need to clean menu cause it may have 'doubles' due to many import attempts.
- You will also have to fill sidebars with widgets. To do it go to Appearance->Widgets .
- Theme should look good enough now.
Cause of server load and servers(yours and ours) connection speed there can be issues while making full demo data import.
When you select to download attachments there is possibility it won't make it in 30 seconds(usual default maximum execution time of PHP script).
That is why you sometimes have to try many times before all data is downloaded to your server.
That however may produce some errors in imported data. This may cause site to not working at all or giving strange results.
To avoid it, but still get view on how sites are created, don't check Download and import file attachments while importing.
If you want to install demo data for woocommerce or other plugin you will have to firstly install plugin required for it, or you will encounter issues.
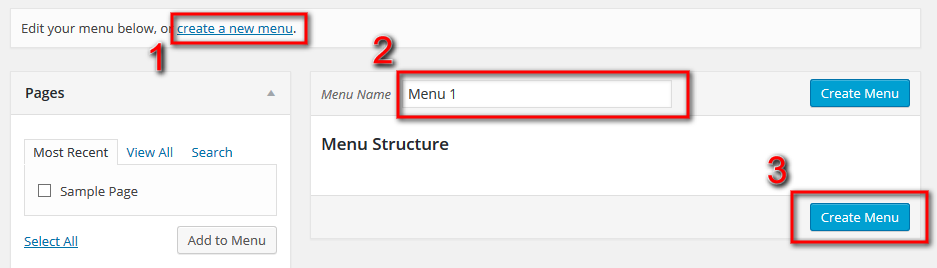
Adding menu
To create main menu go to Appearance->Menus, create some menu(even with one position) and select this menu as Theme locations-> Site Navigation. Read more about creating WordPress menu.
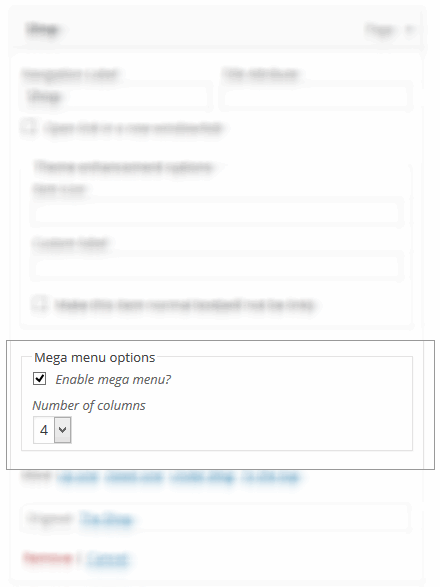
For every position in menu you have few bonus options that will be used only in Site Navigation menu, and it gives result like shown on image below:
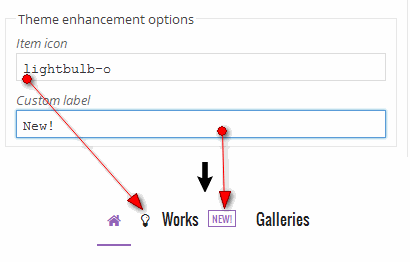
You can also check option Make this item normal text(will not be link) - useful for parent of submenu.
Using mega menu
We will talk here about such effect:
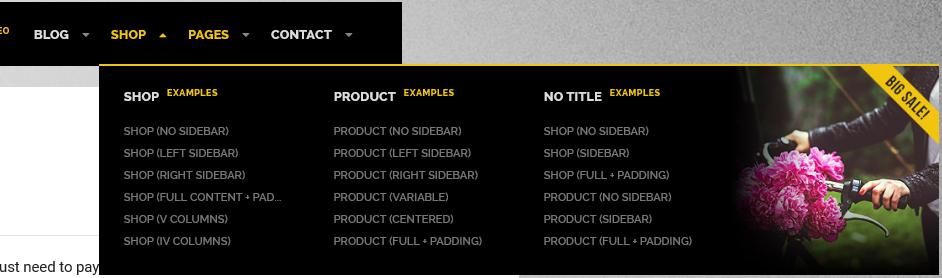
This kind of menu is intended for situations when you wish to show many sublinks in columns. If offers naming columns with linkable title.
This is how you should arrange your menu items to make it work
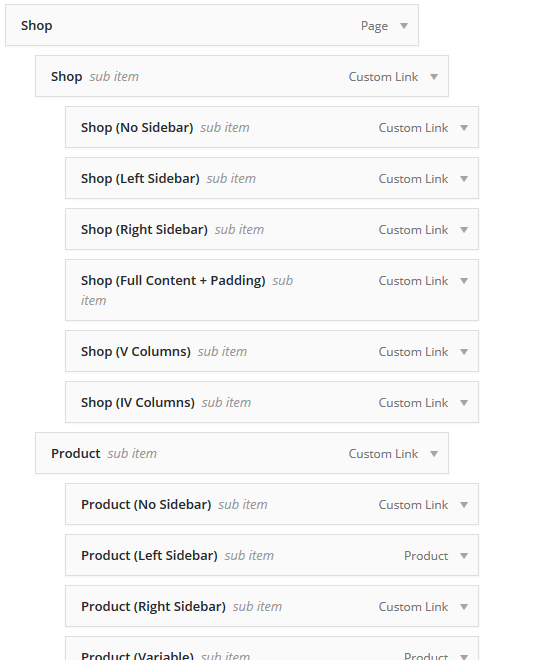
First two levels of menu have different options available.
- Level 1:
- Enable mega menu? - Only if checked other options will appear.
- Number of columns - Three variants.
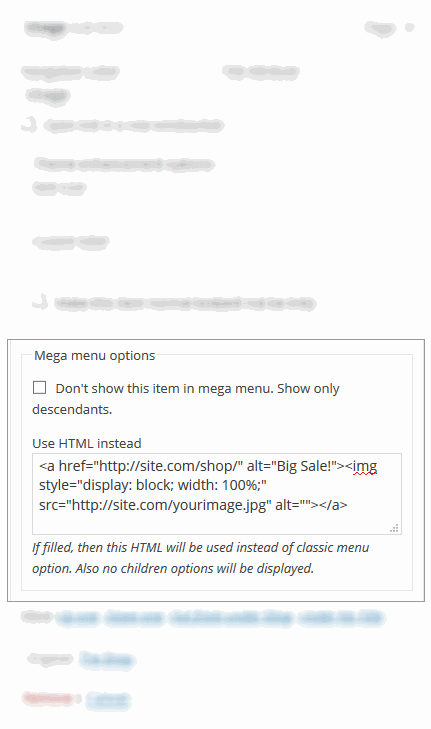
- Level 2
- Don't show this item in mega menu. Show only descendants. - if checked this item won't appear.
- Use HTML instead - good for showing some linked image, or other special things. Sample HTML code for this can look like this:
<a href="http://site.com/shop/" alt="Big Sale!"><img style="display: block; width: 100%;" src="http://site.com/yourimage.jpg" alt=""></a>
Changing options
Most of theme options you can find in Appearance->Customize. Changing options through Wordpress Customizer gives you live preview of changes before you save anything, so no more guessing what each change will bring to your layout.
Before we describe each group of options is is worth to know that some changes you make can be seen instantly, and for others you will have to wait few seconds. It depends how many things each option will change.
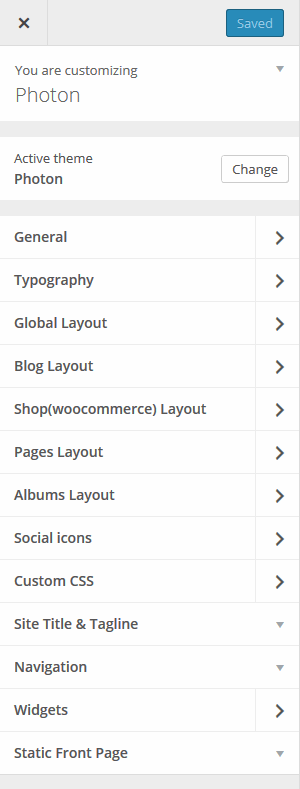
Customize -> Global Layout
In this section you can set things that will affect layout across whole site. Some parts can be overwritten in other settings like Blog, Pages, Albums and Shop.
Main settings
Here you can set:
- Predefined colors - sets color for many elements across whole layout. Treat it as base setting cause some of these elements can be overwritten.
- Favicon - upload here image that will be visible as icon of our site. We provide default one and you can use it:-)
- Custom site background image/color
- Custom default cursor - you have few ready variants, and also you can upload your own.
Since WordPress 4.3 and Photon 1.1.4 use should you build in WordPress Site icon(Appearance -> Customize and clicking on Site Identity) for favicon. Read more.
Page preloader
Here you can set few things about preloader: background, colors, animation, text. Page preloader works as mask for time while layout of page is not ready yet and it(page) is not useful.
Logo
Here you upload logo for your site or use text one. Uploaded logo will be resized by CSS to fit layout in some cases.
You also have field to upload bigger logo for retina like devices. Use there bigger size image but in same proportions like normal logo.
Thanks to that it looks good, on both Retina and traditional screen.
Text logo:
If you use text logo an it has more then one word, then instead of white space you might want to use unbreakable one. It is helpful when logo is displayed on smaller screens or your header is crowded.
To do it insert instead of white space so your text in logo will look like This is Photon!
After save you want see this but don't worry, they are still there:-)
Top space
This option is useful to give breathing space for content after header. You can also use it to mimic full block of header, instead of default one that is broken in two parts. To do it just set top space to same color as header.
Header - Main Settings
Here you can set:
- Header style - 2 variants to choose.
- Background color of header
- Switch on/off header search form
Header - Menu
Here you can set everything that is part of main menu. We hope that you won't need any more options for this part:-)
Title bar
You can set here default look of title bar. These settings can be overwritten for other sections. Not every page use title bar.
Footer colors
Here you can set look of footer area.
Footer content
Here you can set two footer texts, social icons and enable header indicator of footer message.
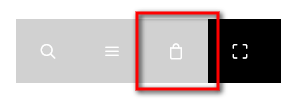
Hidden sidebar
It is always available sidebar, that is activated by clicking on icon in header. Good for some special menus or other tips, information for user. You can set here few things about its appearance.
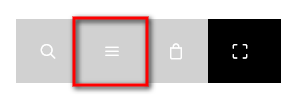
Basket sidebar
It is always available sidebar (but only active if woocommerce is installed and activated), that is activated by clicking on icon in header. You should place there cart widget and also some promotions widgets for example. You can set here few things about its appearance.
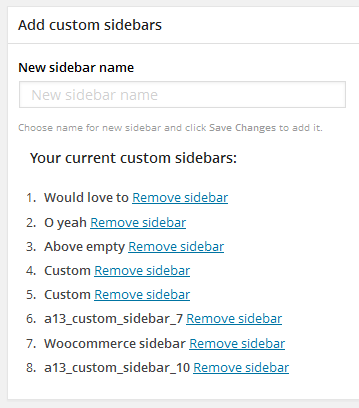
Appearance -> Photon Sidebars<
Here you can create custom sidebars. Later you can set them to be displayed in pages. If you wish, each page can have own sidebar!
To add sidebar simply add its name(not obligatory) and click Save Changes. After you add new sidebar you can manage it in Appearance->Widgets.
Removing sidebars is instant action, so be careful what you remove.
Widgets & Sidebars
In Appearance->Widgets menu you will see set of widgets. To use it just drag and drop them to sidebar you would like to see them in. Available sidebars:
- Blog sidebar - Widgets from this sidebar will appear on blog, search results, archive page and 404 error page.
- Post sidebar - Widgets from this sidebar will appear in single posts.
- Page sidebar - Widgets from this sidebar will appear in pages.
- Shop sidebar - Widgets from this sidebar will appear only in shop pages. Woocommerce have to be installed and activated.
- Hidden sidebar - It is always available sidebar, that is activated by clicking on icon in header. Good for some special menus or other tips, information for user.
- Basket sidebar - It is always available sidebar (but only active if woocommerce is installed and activated), that is activated by clicking on icon in header. You should place there cart widget and also some promotions widgets for example.
- Footer widget area (1-5) - Widgets from this area will be displayed on every page in footer. Depending on how many widgets area you will fill and current screen width, there will be displayed 3, 4 or 5 widgets columns. On small screen widths(mobiles) it will be 1 or 2 columns.
Available widgets:
Besides default Wordpress widgets, we also added:
- Apollo13 Social Icons
- Contact info
- Popular Posts
- Recent Albums
- Related Posts
- Shortcodes
We have also extended 3 other widgets. In case of these widgets use these prefixed with Photon - :
- Custom Menu
- Recent Posts
- Recent Comments
Adding Frontpage
To make frontpage and Blog work as it should you have to follow this steps:
- Go to your WordPress Pages->Add new
- Add new page named Home Page and another named Blog. These names are examples, you can change them.
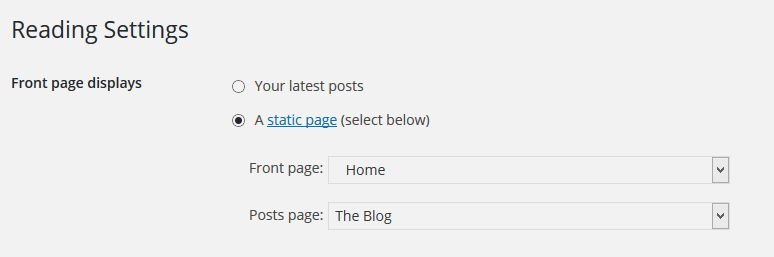
- Go to Settings->Reading->Front page displays
- Choose "A static page (select below)"
- In Front page: choose Home Page
- In Posts page: choose Blog
- Save changes.
- You are done :-)
To select what should be visible on front page go to Appearance->Customize->General->Front page->What to show on front page?
Also if you want to add Blog as separate page just go to Appearance->Menus and add selected Posts page to menu.
With these settings you can setup your front page easily, but there are few things you need to be aware:
- Front page as Page
- Content for this page and all settings are set in Page you selected for Front page(here it will be page named Home).
- Front page as Blog
- Content for this page are posts and all settings are set in Appearance->Customize->Blog Layout. Title displayed on blog is title of Posts page or if there is none such page then it use default text from translation.
- Front page as Albums list
- Content for this page are albums and settings are set in Appearance->Customize->Albums Layout.
- Front page as Album
- Content for this page and all settings are set in Album you selected to display on Front page(Appearance->Customize->General->Front page->Select album to use as front page).
Adding New Posts
If you are not familiar with adding posts in WordPress please read http://codex.wordpress.org/Writing_Posts
Adding posts is same as always in WordPress, but with few additional options from our theme.
Posts options
There are two groups of settings. First group is about look of post on posts list named Blog post details, and second is about settings used when viewing single post and it is named Post layout.
- Blog post details:
- Alternative link - If you fill this then when selecting post from Blog(post list), it will lead to this link instead of opening post.
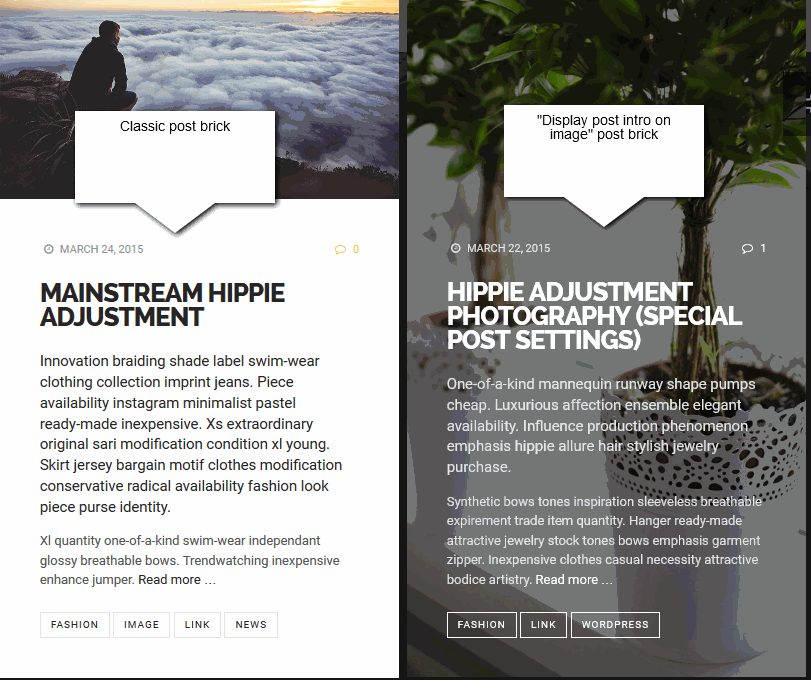
- Post media - You can choose between Featured image or Video to represent post.
- Display post intro on image - Thanks to this option you can display excerpt of post on featured image(check below image). Selecting this option gives additional two options:
- Color covering image - Leave empty if no cover is needed. Useful if image is too colorful.
- Empty space in top - To better show up image.
- Size of brick - How many bricks area should take this post in posts list.
- Post layout:
- Page background - you can decide to use default background or to change it specially for this post.
Posts excerpts
If in Appearance->Customize->Blog Layout->Posts list appearance->Type of post excerpts is set to Auto,
then if while writing posts you won't use more tag,
then theme will use excerpt feature. Excerpt are made automatically, but you can also specify what will be displayed.
Just find Excerpt box, and type text you wish Read more.
If you won't give excerpt either, then post will be cut after first 40 words. This number can be changed in Appearance->Customize->Blog Layout->Posts list appearance->Number of words to cut post.
Post formats
Our theme supports also Post Formats. In implementing them we are following general guidelines from Wordpress.
Adding New Pages
If you are not familiar with adding pages in WordPress please read http://codex.wordpress.org/Pages
Adding pages is same as always in WordPress, but with few additional options from our theme.
Pages options
Extra options for pages are:
- Subtitle - If filled it will appear in title bar.
- Post media - You can choose between Image or Video to represent page.
- Content layout - You have several layouts to display your page.
- Top space - You can edit top space specially for each page to achieve fancy effects.
- Sidebar - Global settings, left, right, off(full width content) and options with Children navigation.
If you arrange your pages into sub-pages then you can display this hierarchy with one of these options(check below image). - Sidebar to show - Here you can choose custom sidebar, if you created any.
- Page background - you can decide to use default background or to change it specially for this page.
Children navigation
If you arrange sites in children/parent then you can display this order in sidebar of each page. Below you can see on image how it looks in wild:

Adding Albums
Before you start anything below, it is good to visit Appearance->Customize->Albums Layout
Adding Albums list
To add Albums list to your site first you need to create Albums list page:
- Add new page(Pages->Add new)
- Name it as you wish but keep in mind that if you use nice addresses (eg. yourblog.com/about-me ) than slug of your page have to be different then slug for portfolio set in Appearance->Customize->Albums Layout, so everything will work correct. Best name this page as "Albums" or "Portfolio".
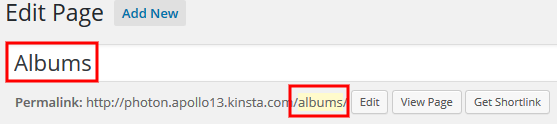
- From template list choose Albums list(image below).
- Publish Page.
- Done

If you wish to use front page as Albums list then settings for Albums list page you will find in page you defined as front page in here.
Add new album
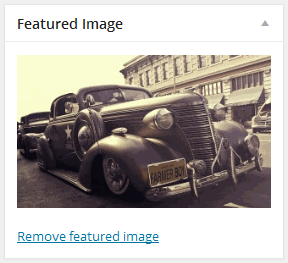
Adding new album is pretty easy. First you should set title and Featured image as it is cover of your album which is visible on Albums list page.
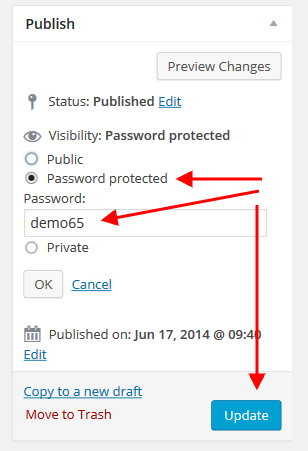
Making password protected Album
To make some albums not accessible without password you can use standard Wordpress post protection settings.
In Visibility options mark post as Password protected and add password. See below screen shot:
Album details
Next you can fill description about this album by using main editor. This description will be only displayed in bricks album.
There are two groups of settings, and third section for uploading images/videos. First group is about look of album on album list named Album list options, and second is about settings used when viewing album and it is named Album details.
- Album list options:
- Alternative link - If you fill this, then clicking on your album on Albums list page will not lead to single album page but to link from this field.
- Size of brick - How many bricks area should take this post in albums list.
- Color under title - It will make background under title text. Gives fancy effect.
- Exclude from Albums list page - If enabled, then this album wont be listed on Albums list page, but you can still select it for front page or in other places.
- Album details:
- Items order - It will display your images/videos from first to last, from last to first, or random order.
- Show title and description of album items - If enabled, then it will affect displaying in bricks and slider option, and also in lightbox.
- Color under title - It will make background under title text on slides and bricks. Gives fancy effect.
- Internet address - You can provide link that is connected to this album.
- Custom info 1-5 - Five custom fields for more details about album. If empty it won't be displayed.
Use pattern Field name: Field value. Colon(:) is most important to get full result. - Present media in - you have 2 options to choose from: Bricks and Slider.
- Bricks:
- Size of content brick(width) - How many bricks area should take description of this album.
- Bricks columns - It only affects wider screen resolutions.
- Max width of bricks content - available space for bricks might be smaller, but newer greater then this number.
- Brick margin - margin between bricks
- Hover effect - many fancy effects with names that tell nothing about how they work:-)
- Slider:
- Fit images - you can use auto(Fit always) or decide in which way images should be stretched to fill screen.
Fit when needed is best for small images, that shouldn't be stretched to bigger sizes, only to smaller(to keep them visible).
However Cover whole screen is best options in most cases. - Autoplay - If autoplay is on, slider items will start sliding on page load.
- Transition type - 4 types: Carousel, Fade and no transition. Also Zooming known better as Ken Burns Effect.
- Gradient above photos - Good for better readability of slide titles.
- Pattern above photos - Used for masking and some darkening.
- List of Thumbs - Enable/disable and decide should it be visible on page load.
- Fit images - you can use auto(Fit always) or decide in which way images should be stretched to fill screen.
- Bricks:
Next it is time to add some photos & videos to present our album. We will work in section Album media - Add images/videos Lets check screen below:
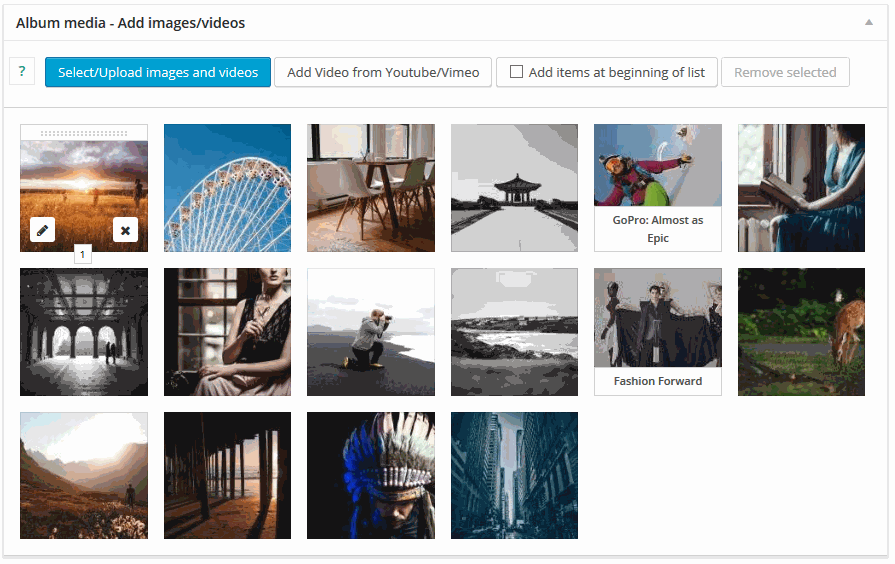
- If your browser supports multi upload then you can use it to upload many images at once. To do it use button Select/Upload images and videos
- To add single video from Youtube or Vimeo use button Add Video from Youtube/Vimeo.
- To mark more items in Media Library and in item list, you can use
Ctrl(Cmd) orShiftkey while selecting them with mouse. - You can drag and drop each item to reorder them.
- To edit item details click on Pencil icon while hovering.
- Every image and video from media library can be used only once in each album.
- Editing details of images and video from media library are done in Media->Library.
- Editing details of video from Youtube or Vimeo are done while editing item - Pencil icon.
- For image item you have following options:
- Link - if filled then clicking image will take you to this URL. Also then this photo won't be visible in lightbox.
- Product this image represents - If you fill this, then on image you will see "add to cart" button for selected product.
- Color under photo - Used in slider.
- RatioX in bricks theme - How many bricks area should take this image. Used only in Bricks.
- For video item from Media Library you have following options:
- Autoplay video - Works only in slider
- RatioX in bricks theme - How many bricks area should take this video. Used only in Bricks.
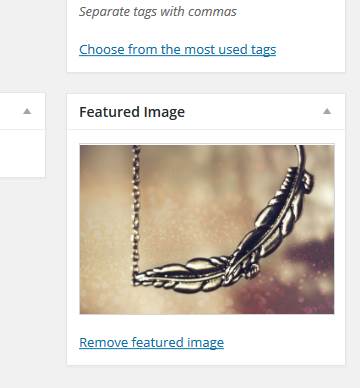
- To set thumb for video from Media Library:
- Find this video in Media Library and click it to open popup
- In popup find link Edit more details
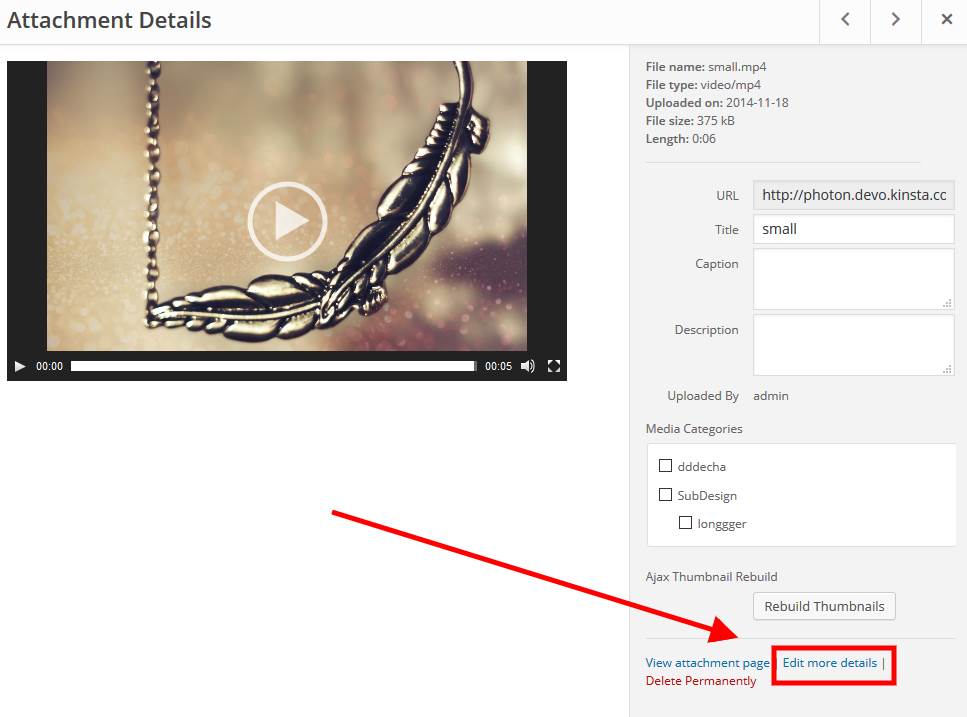
- On new page that will open set featured image - it will be your thumb.
- For video item from Youtube or Vimeo you have following options:
- Link to video - youtube link, vimeo link
- Video Thumb - Displayed instead of video placeholder in some cases. If none, placeholder will be used(for youtube movies default thumbnail will show).
- Autoplay video
- RatioX in bricks theme - How many bricks area should take this video. Used only in Bricks.
- Title - Used in slider and lightbox
- Description - Used in slider and lightbox
In case of Slider images are loaded in full size(same as uploaded). Important thing here is to keep images in rational dimensions cause uploading here 10MB file could kill user transfer when viewing single album. And what would happen if you would have 20 images with 10MB each... :-)
Here is cite from our user about uploading too big photos, it is from our forum:
That is a real shame. For any other photographers that might read this post, there are two very important reasons to keep the images a reasonable size:
1) Loading time. The last thing you want when an agent or client is viewing your portfolio is for them to have to wait more than a split second for an image to load. With a 3MB image and even a reasonable connection speed these people will quickly move on and find another photographer for the job (especially if you have a number of images in your portfolio).
2) Discourage theft of your images. An 800px image will print at 300dpi on a 4x6 but no larger. This makes it more difficult for anyone to use your images without permission or payment. If you provide a 3MB image, you are asking for your album to be stolen. This happens ALL THE TIME.
JackieR0
Adding multiple Albums list and Album Categories
You can create multiple albums list if you wish. To do it, first you have to assign your albums to different categories. You can do it by choosing categories while adding album, like you can see on image below:
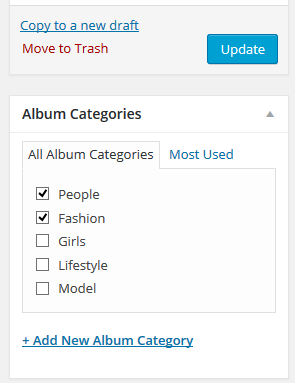
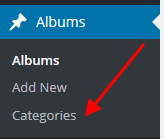
All your genres can be find in Albums->Categories
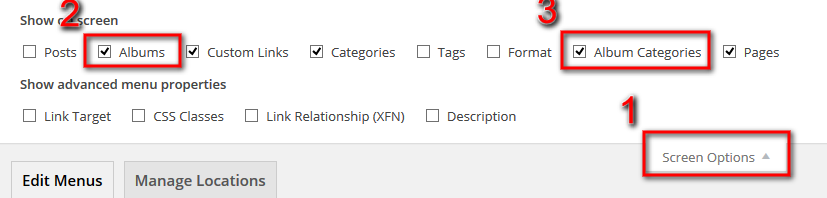
After you assigned different albums to different categories you may want to add this Albums list to menu. To do it go to Appearance->Menus and be sure to activate adding Albums Categories to menu, just like explained in creating menu section.
If you are using multiple Albums list then template for Albums list will display all your albums with filter, so you can view them by category.
Adding Woocommerce
Woocommerce is plugin that makes your site eCommerce store. To get this plugin and get more info about it follow to http://wordpress.org/plugins/woocommerce/.
After you will install and activate it follow this description to understand how to make it integrated with theme.
First you have to Install WooCommerce Pages. You will see notification about it in you admin panel. This will create and configure pages that are important to make woocommerce work.

All theme setting for WooCommerce you can find in Appearance->Customize->Shop Layout
Sidebar for shop pages is Shop sidebar.
If you need dummy data for your shop then it is in plugin package. In woocommerce documentation you can find more info about it.
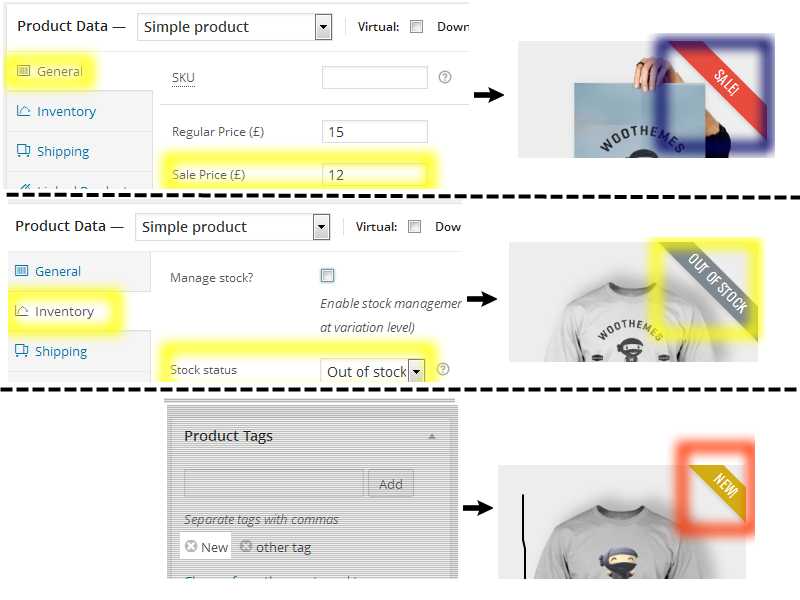
Ribbons on products
On each product you can have following ribbons(check below screen shot also):
- Out of stock - it shows when item is not available at the moment.
- Sale - is shows when item is on sale.
- New - is shows when product has tag "new".
Translating theme
Theme is prepared for translation, so it will just require some time for you to see our theme in your language(if it isn't translated to it yet). If you are not using any plugin for translations like WPML, then keep on reading. Important files you will find in theme directory in photon-a13/languages/default.po
This file should be opened in program like Poedit and translated. After everything is done you have to save your translation with proper name. Names for each country can be found here (in parenthesis in titles). So for example for German - Deutsch you should save files as de_DE and get 2 files: de_DE.po and de_DE.mo.
Copy these files to photon-a13/languages
At end you have to go to your Admin Panel, Settings->General->Site Language and set your language.

After that if everything went fine, you will see theme in your language:-)
In every update, file default.po may change as we may add some new functions or fix some spelling, but you can use your old translation to get most of work done. We will inform about it in change log.
Good article about translating theme can be found in http://www.solostream.com/blog/tutorials/translate-wordpress-theme/
Also good to read is http://codex.wordpress.org/Translating_WordPress
There is also file with translation in backend area in photon-a13/languages/admin/default.po. You can edit it by following same process.
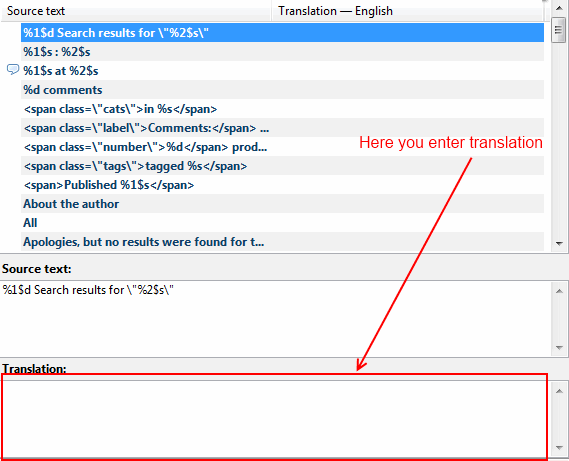
Here we post image where to type translated texts in Poedit, as not everyone get it right away.
Translating theme/site with WPML
WPML stands for WordPress Multilingual and it is a plugin that can make your website multilingual.
They currently power over half million websites and are the industry standard in allowing you to translate themes, plugins, theme options, posts,
pages, widgets, custom post types and everything else on WordPress. On top of that they have an amazing support forum.
Their plugin is very flexible with built functions. You can order custom translations from over 50 languages straight from the WordPress dashboard from ICanLocalize.
Here is what you need to know on turning your site multilingual with WPML.
First, you need to to purchase a recent version of WPML, including the String Translation and Translation Management modules.
Initial Setup
- Install and activate the core WPML plugins (WPML Multilingual CMS, WPML String Translation, WPML Translation Management), and then other WPML plugins that may depend on them.
- Set up WPML from WPML->Languages. See WPML Getting Started Guide for complete reference, but the initial simple three-step setup is self-explanatory, asking you to choose your default language, a set of active languages, and a language selector.
Translating Pages, Posts and other post types
To translate a page you need to go to Pages menu and in the list you will see columns for each active language, with a pencil icon (for 'edit translation') or a '+' icon (for 'add translation') next to each page.
Right now you just need to translate your page into the new language.
Read this to easily duplicate your existing content.
Translating custom post types and taxonomies
Theme comes with extra custom post type named Works, and custom taxonomies connected to it. In order to get a similar interface for translation/duplication as for posts and pages, you need to go to WPML->Translation Management, and select the tab Multilingual Content Setup.
Translating Menus
WPML can synchronize menus for you. This means that if some entries, for example some pages, posts or categories, are in the English menu, WPML can generate and keep in synch menus for other languages pointing to the translated versions of these pages, posts or categories.
From WordPress Appearance->Menus you can see your existing menus and add menu translations and synchronize menus across translations.
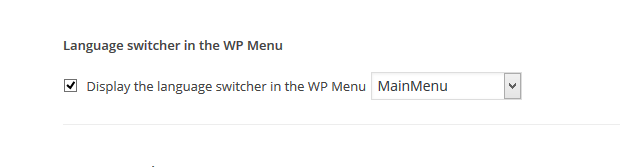
To show the language switcher in the Menu go to WPML->Languages->Language switcher in the WP Menu and select menu that is your Main menu(in header location).
Translating theme texts and other strings in your site
To translate strings you need to follow the procedure for Theme and Plugin Localization. Go to WPML->String translation, and in Select strings within context select admin_texts_theme_photon-a13 and you will see theme strings and which ones are translated or not.

Modification of theme
Many of you may be tempted to edit theme files, but by doing so you block yourself from geting updates of theme, as you will loose your changes when you update theme. Fortunately there is solution - making child theme. Even WordPress team advice this as best solution:-)

Anyone intrested in this should read http://codex.wordpress.org/Child_Themes
But lets check how to do it with this theme.
In file downloaded form ThemeForest there is attached sampel child theme, so you can start changing theme even faster. To install it follow this steps:
- Install normal theme.
- Repeat step 1 but now install theme from Child Theme\photon-a13_child.zip located in file downloaded from ThemeForest.
- Activate child theme.
- Done.
Now you can overwrite styles, theme functions and even whole templates. Lets check some examples.
Changing CSS
If you want to change color and font size of content area you just have to edit style.css in child theme and add:
#content {
    color: #000;
    font-size: 20px;
}
Now you have black big text :-)
Good tool to detect what should you change and where is Firebug for firefox. Here is tutorial how to use it http://www.youtube.com/watch?v=oe1nqI4fNRc. Any browser has similar tool(under F12 key you can call it).
Custom CSS
For changes in CSS you can also use special area in theme Appearance->Customize->Custom CSS. There you can insert your custom css.
In this theme default stylesheet is loaded from main theme, and then you can overwrite CSS rules in style.css in child theme. After this comes user.css with changes set in admin panel. So finally it loads in this order:
1. main theme style.css
2. child theme style.css
3. user.css(settings form admin panel)
4. Custom css from panel(it is added at end of user.css)
Changing theme functions
This example might not work with this theme. It is only here to demonstrate the idea.
Whenever you make modification in theme functions, you are facing risk of losing your changes with theme update. As we already know using child theme saves this situation. However to use it, you have to see some example.
Lets look at example situation when you asked for some modification on our forum and you received code that changes few lines in PHP.
Lets say you had to change code:
get_search_form(false)
to
'Search form:'.get_search_form(false)
First we have to find in which function was this change. We look at code:
/*
 * Header search form
 */
if(!function_exists('a13_header_search')){
    function a13_header_search() {
        return
            '<div class="search-container">'.
            '<div class="search">'.
            '<span class="icon-search open tool"></span>'.
            get_search_form(false).
            '<span class="icon-cross close tool"></span>'.
            '</div>'.
            '</div>';
    }
}
Now that we found whole function body, instead of doing modification in original code, we first copy it to child theme.
Just open functions.php in child theme and drop above code in at end of file. There will be already some code in it so you should add your code after such comment:
/*
 * Add here your functions below, and overwrite native theme functions
 */
So in result you should have(in functions.php file):
/*...some default code above... */


/*
 * Add here your functions below, and overwrite native theme functions
 */

/*
 * Header search form
 */
if(!function_exists('a13_header_search')){
    function a13_header_search() {
        return
            '<div class="search-container">'.
            '<div class="search">'.
            '<span class="icon-search open tool"></span>'.
            get_search_form(false).
            '<span class="icon-cross close tool"></span>'.
            '</div>'.
            '</div>';
    }
}
Now you can make your modification and in final result have:
/*...some default code above... */


/*
 * Add here your functions below, and overwrite native theme functions
 */

/*
 * Header search form
 */
if(!function_exists('a13_header_search')){
    function a13_header_search() {
        return
            '<div class="search-container">'.
            '<div class="search">'.
            '<span class="icon-search open tool"></span>'.
            'Search form:'.get_search_form(false).
            '<span class="icon-cross close tool"></span>'.
            '</div>'.
            '</div>';
    }
}
You have now overwritten main theme function, and your version will be loaded.
If you activate main theme instead, then your change won't be loaded.
Most interesting functions you will find in advance/utilities(in main theme) , but there is more functions that you can change in child theme. All functions that can be overwritten has before its definition code: if(!function_exists('function_name')).
If you wish to change other functions ask on our forum for support in that case or just don't bother with child theme and change main theme(if you understand implications;-) ).
Support Forum
In case of any questions or doubts, do not hesitate to contact us via our Support Forum http://support.apollo13.eu/
Instruction how to get Purchase Code:
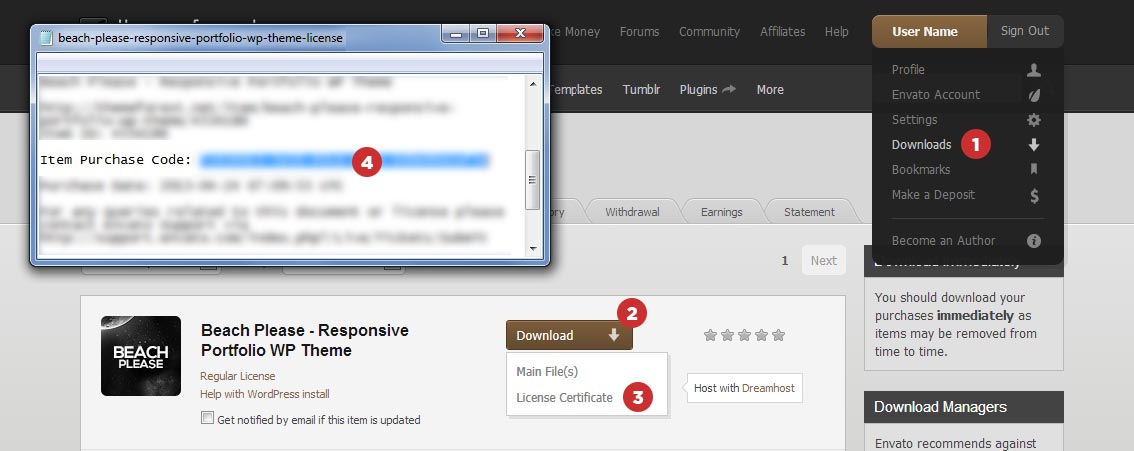
Image sizes video support and others
Template image sizes
Theme uses script that auto scale images so it doesn't define any sizes of images.
For WooCommerce you can change images sizes in WooCommerce->Settings->Products->Display->Product Images. After this you will have to rebuild thumbnails for it.
For this task you can use plugin, we advice AJAX Thumbnail Rebuild. Just "Upload the plugin to your blog, activate it, done. You can then rebuild all thumbnails in the tools section (Tools -> Rebuild Thumbnails)." (copied from plugin page).
Video/Audio support
Theme support Youtube and Vimeo videos, and also HTML 5 types.
For youtube best to use links as : http://www.youtube.com/watch?v=JByDbPn6A1o
For vimeo best to use links as: http://vimeo.com/12280336
Any other link will be treated as HTML 5 video. Browsers that understand the HTML5 tag will display MPEG/H.264 (.mp4) files, VP8/webm (.webm), or Ogg/Theora (.ogv) files. Other browsers can use Flash to play the .mp4 or .flv.
Plugins recommendations
Here you can see recommended by us plugins, that works well with this theme, and also you can see recommended configuration for these plugins, so it is worth to see:-)
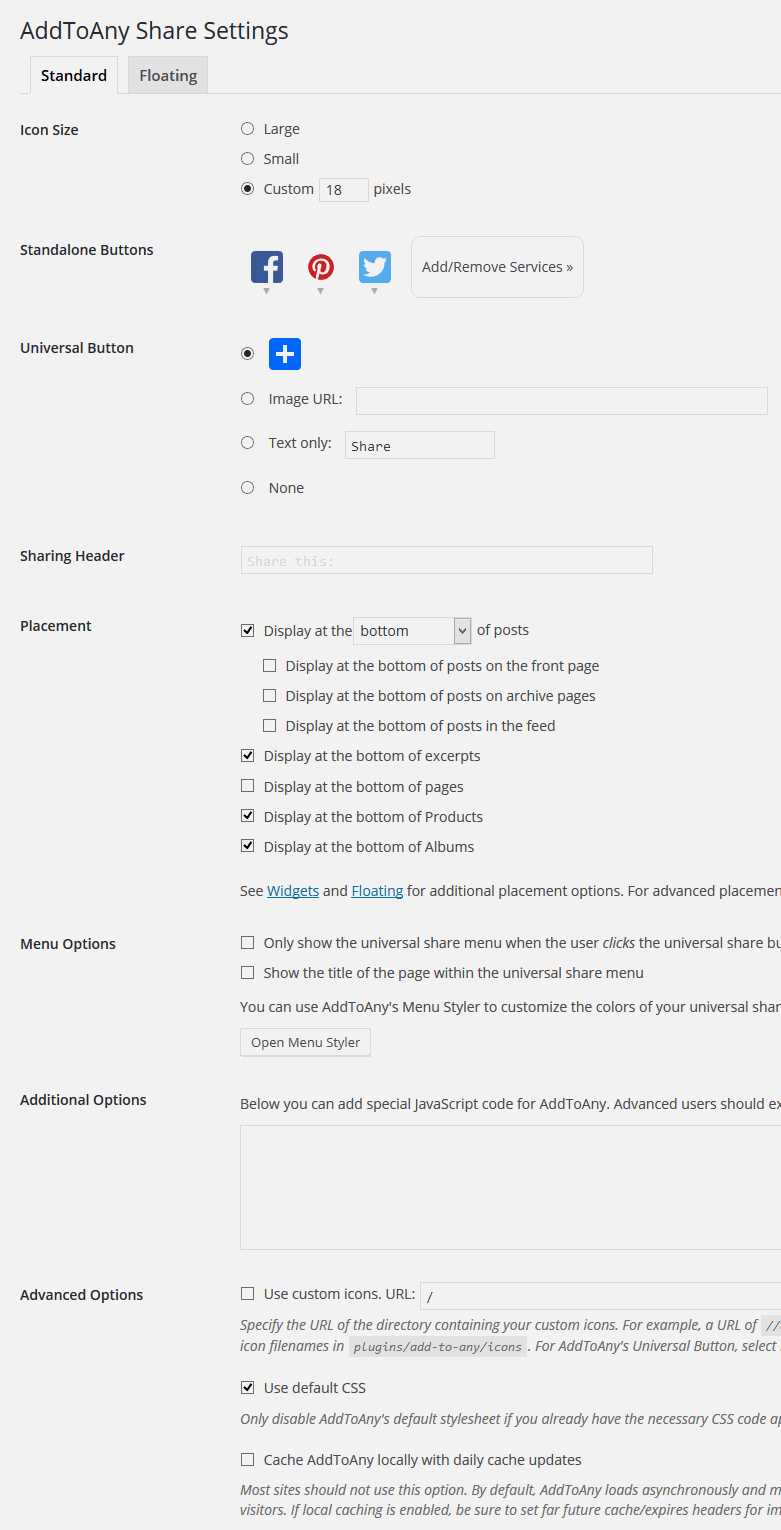
AddToAny - share icons
We have used this plugin to get share icons on our albums and other places : https://wordpress.org/plugins/add-to-any/. Here is also screen shot of our settings for this plugin:
Contact form
You can get it from http://wordpress.org/plugins/contact-form-7/.
It is best plugin for preparing contact form. Here you will find plugin documentation - http://contactform7.com/docs/
Facebook Open Graph, Google+ and Twitter Card Tags
For better experience while sharing albums you should install this plugin.
You can get it from https://wordpress.org/plugins/wonderm00ns-simple-facebook-open-graph-tags/.
High DPI Screen users(Retina)
If you are worried about image quality for your retina(or alike) users you should check this plugin http://wordpress.org/extend/plugins/wp-retina-2x/faq/ . It will serve better quality images for high DPI screens.
Post Types Order
You can get it from http://wordpress.org/plugins/post-types-order/.
If you wish to reorder posts or albums differently, then this plugin is for you.
WPML - Languages.
This plugin is commercial one, but widely used by Wordpress community. Thanks to it you can work with different languages on your page. You can get it from http://wpml.org/.
Woocommerce Multilingual
This plugin adds currency switcher for Woocommerce. It requires WPML and Woocommerce plugins. You can get it from http://wordpress.org/plugins/woocommerce-multilingual/.
Wishlist Woocommerce
This plugin adds Wish list functionality for Woocommerce. You can get it from http://wordpress.org/plugins/yith-woocommerce-wishlist/.
WP Content Copy Protection
This plugin is commercial one. This plugin Protect your content from selection and copy, you can also block "right click" and more things. You can get more info on plugin page http://www.wp-buy.com/product/wp-content-copy-protection-pro//.
Sources and Credits
The scripts and plugins used is the project:
- jQuery
- Modernizr
- Masonry
- jQuery mouseWheel Brandon Aaron
- FitVids.js
- Automatic Updates For Private And Commercial Themes
- HTML5 Boilerplate
- Font Awesome
- Hover Effect Ideas
- Single Element CSS Spinners
- How to add a Color Control with Alpha/Opacity to the WordPress Theme Customizer
- Retrieve Attachment ID from Image URL
and lots of internet wisdom out there. Thanks a lot everybody!
Once again, thank you so much for purchasing this theme. As we said at the beginning, we'd be glad to help you if you have any questions relating to this theme. We'll do our best to assist.
Apollo13 Team
Customize -> Socials icons
Here you provide links to social profiles you have. What you set here will be displayed in Apollo13 Social Icons widget
You can drag & drop social items to set them in order you wish to see on your page.
Only filled inputs will activate each social icon. Not filled = not shown :-)